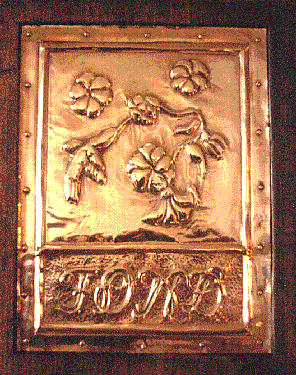
I thought I'd try and post some various projects I've done over the years to get these boards moving. Please join in and post some of your own.
Some years ago I was browsing through a craft supply store and ran across some heavy copper foil. Seemed like something that it might be fun to experiment with so I bought a bit of it. A couple of months went by until one day I was trying to think of an interesting gift to make for a friend. I wanted to make a nice "home sign" with their family name on it to hang by the front door of their house. The copper seemed like it would fit well with their decor.
First I drew out a design of flowers and a humming bird for the top of it. (This friend collected humming bird stuff.) And a fancy script with their name, "Fond" at the bottom. ( The whole design in reverse since I would be working the copper from the back.) Then I transferred the design to the copper sheet with carbon paper being careful not to make an indentation in the copper.
I needed a surface to work on with enough "give" to allow the sheet to dent under my working it, but still enough support that it wouldn't crease. I found a stack of newspaper worked pretty well for this.
I experimented with different tools to work the copper and found that metal tools didn't work very well, they tended to scratch and gouge too much. Finally I had the idea of making some tools by carving some chopsticks into various size points and sanding them smooth. (These were pine chopsticks, just hard enough to do the job but soft enough not to scratch or gouge.)
I gradually worked over the design, pressing and drawing the points into the sheet and sketching out the over all structures. Then I turned the sheet over and worked the outside edges of the design with a slightly sharper point to give the edges distinction, then smoothing down the background with a flat tool. Turned it over again and worked the design a little deeper and so on, gradually working each side until the design was clearly "protruding" and the background was reasonably smooth.
Once it was done I filled the back with a little plaster (Spackle) to prevent it from denting, and then nailed it with brass tacks into a pine frame in which I had routed out a space for the copper.

You can find sheet copper here-
http://basiccopper.com/Please post comments or any projects of your own.


